⛰️ Japan is covered in thousands of mountains and trails, and the vast majority of them can be climbed without a permit, a guide, or anyone checking who you are. Compared to hiking in many other countries, that’s incredibly convenient — but it also means that if something goes wrong out there, no one automatically knows where you went or when you were supposed to be back.
That’s exactly what a tozan todoke (登山届, “mountain hiking notification”) is for. Filing one before you set out is strongly recommended on every hike in Japan, and legally required on some mountains — Gunma’s Tanigawadake and parts of Nagano’s Northern Alps among them — because it’s what lets rescuers move quickly and accurately if you don’t come back on time.
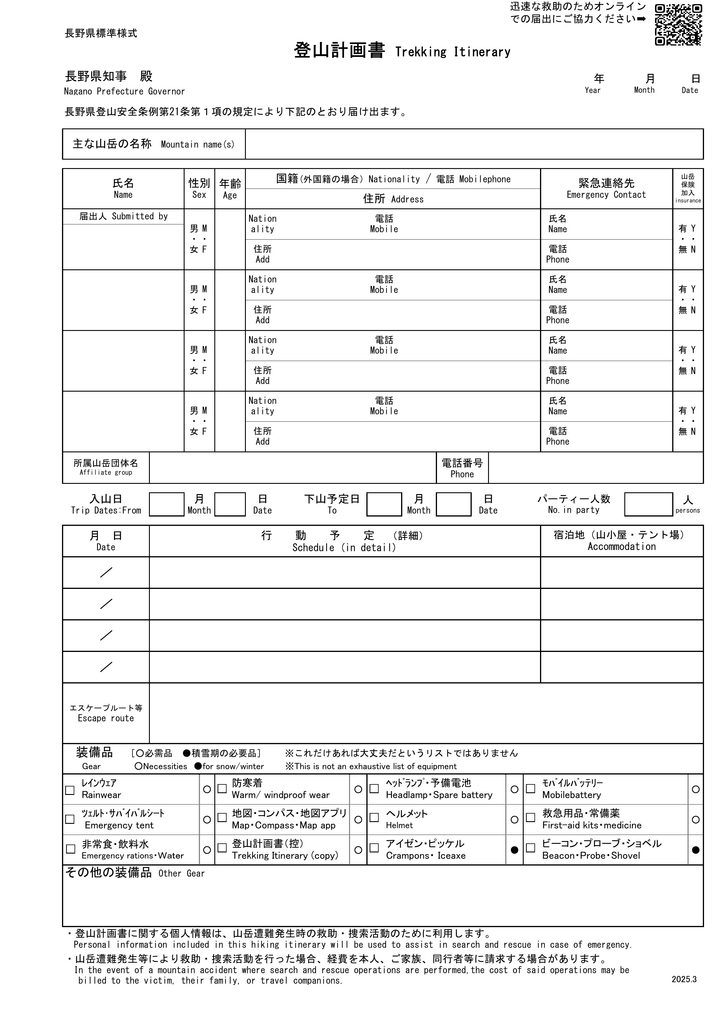
Source: Nagano Prefecture official website
Why File a Tozan Todoke?
A tozan todoke is essentially your hiking plan on paper (or online): your route in and out, who you’re with, your planned start and finish times, and how to reach your emergency contact. If you go missing or don’t return on schedule, that’s exactly the information rescue teams need to know where to start looking — instead of searching an entire mountain range blind.
🎁Here’s a bonus most people don’t think about, though: filing one is genuinely useful for you, too. Mapping out your route means you actually have to work out how tough the hike is, how long it’ll take, and what time you need to leave — planning that’s worth doing whether or not you ever need rescuing.
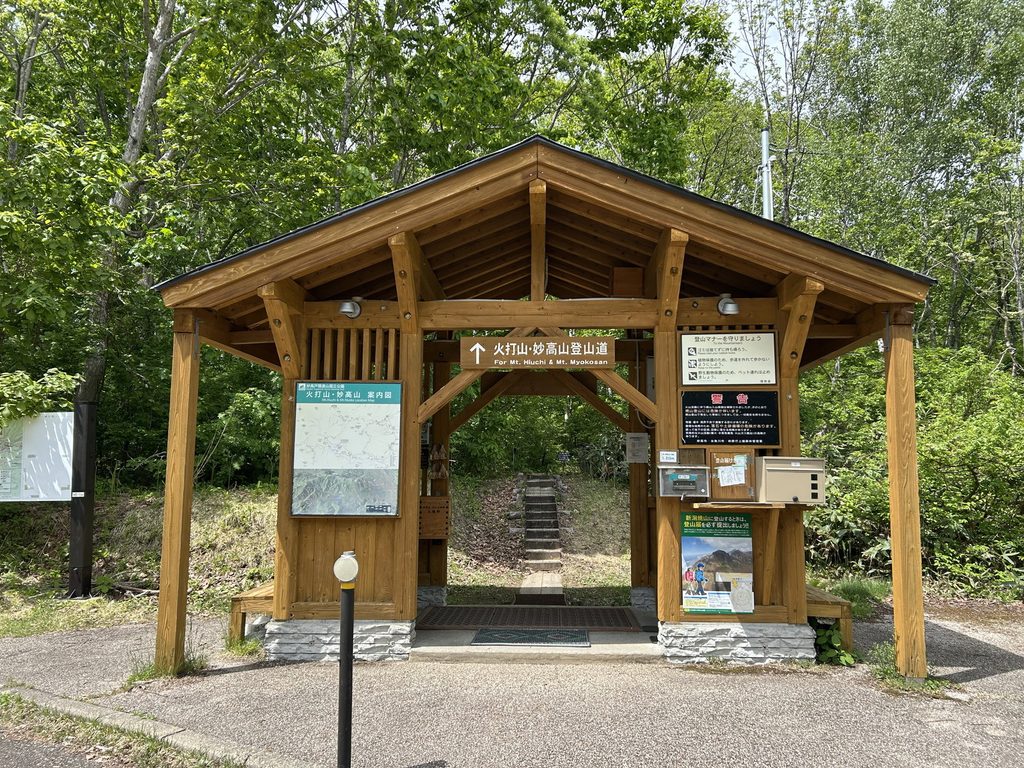
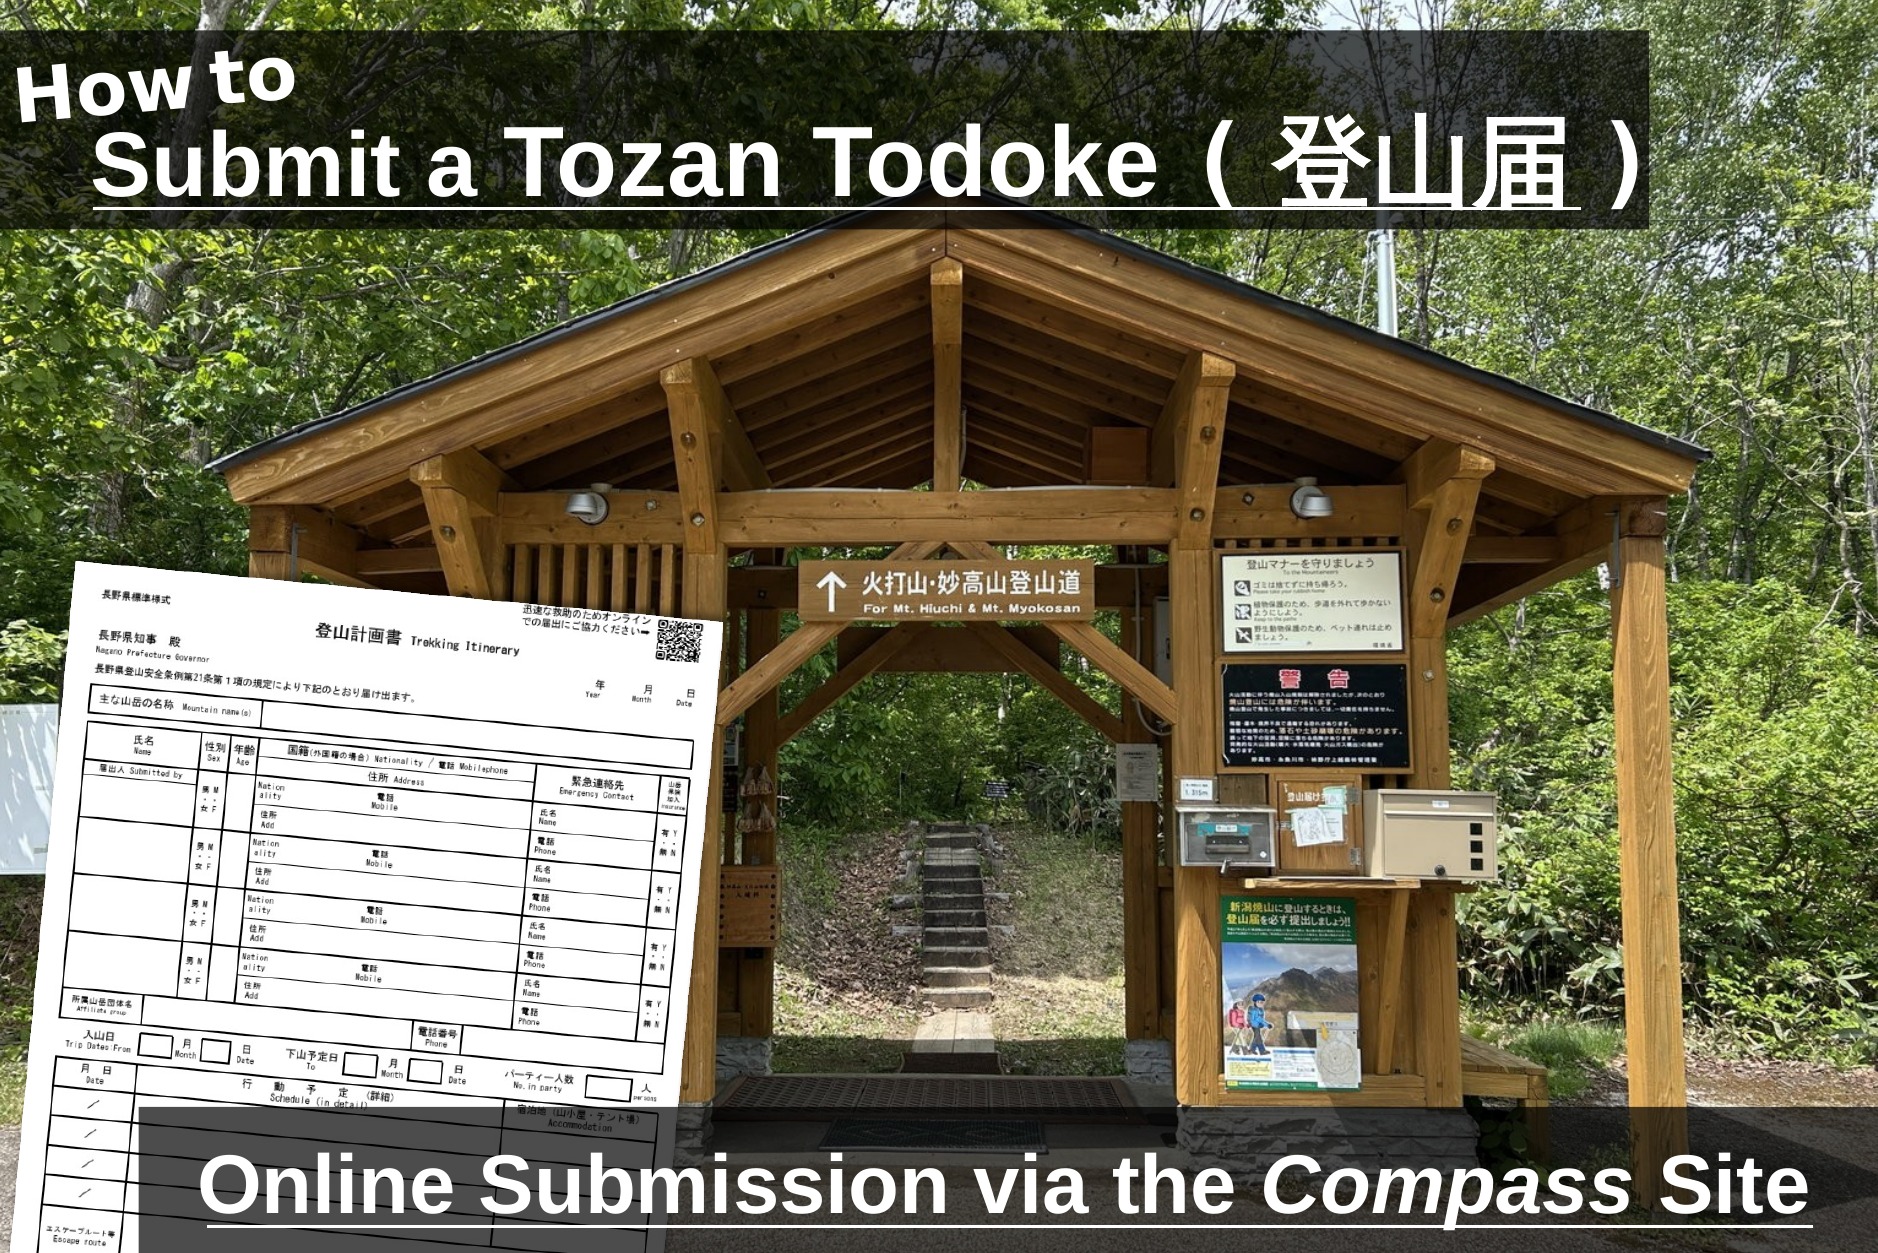
— the wooden box on the right is where you’d submit a paper form by hand.
You can usually still submit a paper form by hand at the tozan todoke post (登山届ポスト) near the trailhead, but in practice this doesn’t always work out — there may be no forms left to fill out, the submission box is easy to miss, and an English-language form sometimes isn’t available at all. For all of these reasons, filing online through Compass before you leave home is the option I’d recommend.
What Is Compass?
Compass (山と自然ネットワーク・コンパス) is the platform I’d point you toward: a free online tozan todoke service run by Japan’s Mountain Safety Measures Network Council*. Fill in your plan once and it goes straight to the police departments covering your route — from your phone or a computer, in a matter of minutes, no paper form or trailhead box required. Basic registration and submission are both free.
*Made up of the Japan Mountaineering and Sport Climbing Association, the Japanese Alpine Club, the Japan Workers’ Mountaineering Federation, and the Japan Mountain Guides Association.
💡One thing to know going in: Compass does have an English interface, but it isn’t applied consistently across every page — you may find yourself bounced back into Japanese mid-flow (I ran into this myself while putting this guide together). Where that happens below, I’ll tell you exactly what the Japanese text says so you’re not stuck guessing.
Creating a Compass Account
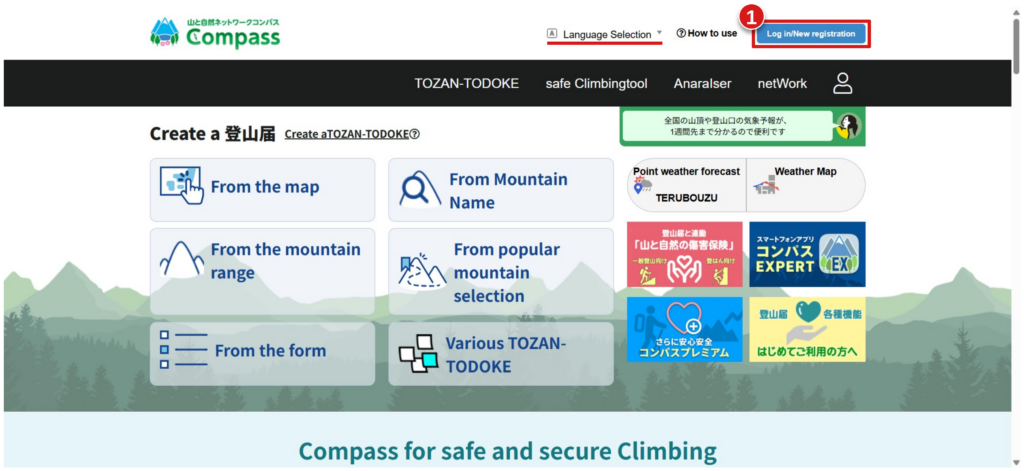
Step 1: Go to the Compass homepage. Set your language from the selector in the top right if it isn’t already set to English, then start registration by clicking Log in/New registration (1).
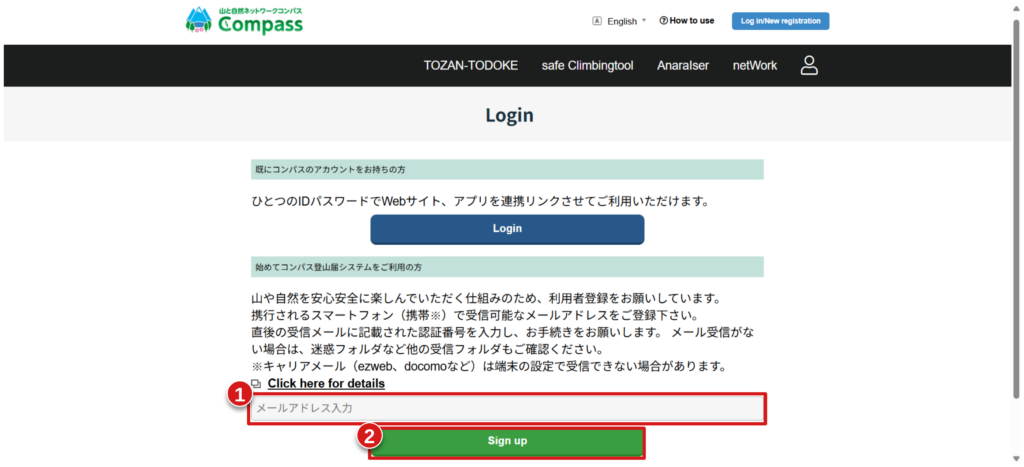
Step 2: Enter your email address. This next page reverts to Japanese for some of its text, so here’s what it’s asking for: it wants an email address you can actually check from your phone while hiking — not just one you only check at home. Enter it in the field near the bottom (1) and press Sign up (2).
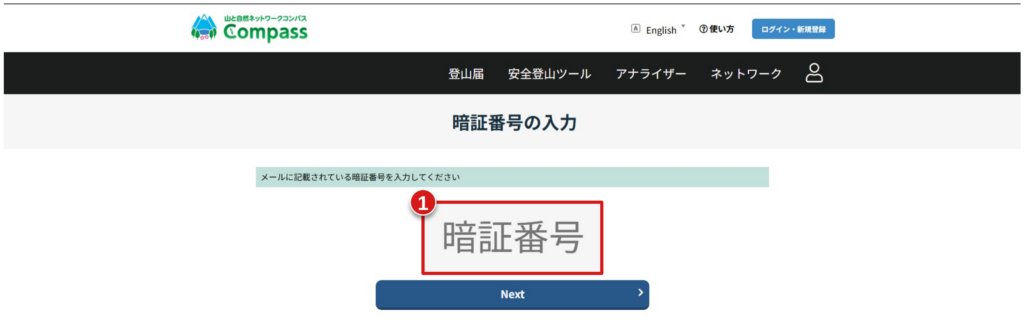
Step 3: Enter the verification code. Compass emails you a numeric code (暗証番号) right away. Copy it into the box on this page (1) and press Next. Check your spam folder if it doesn’t arrive within a minute or two.
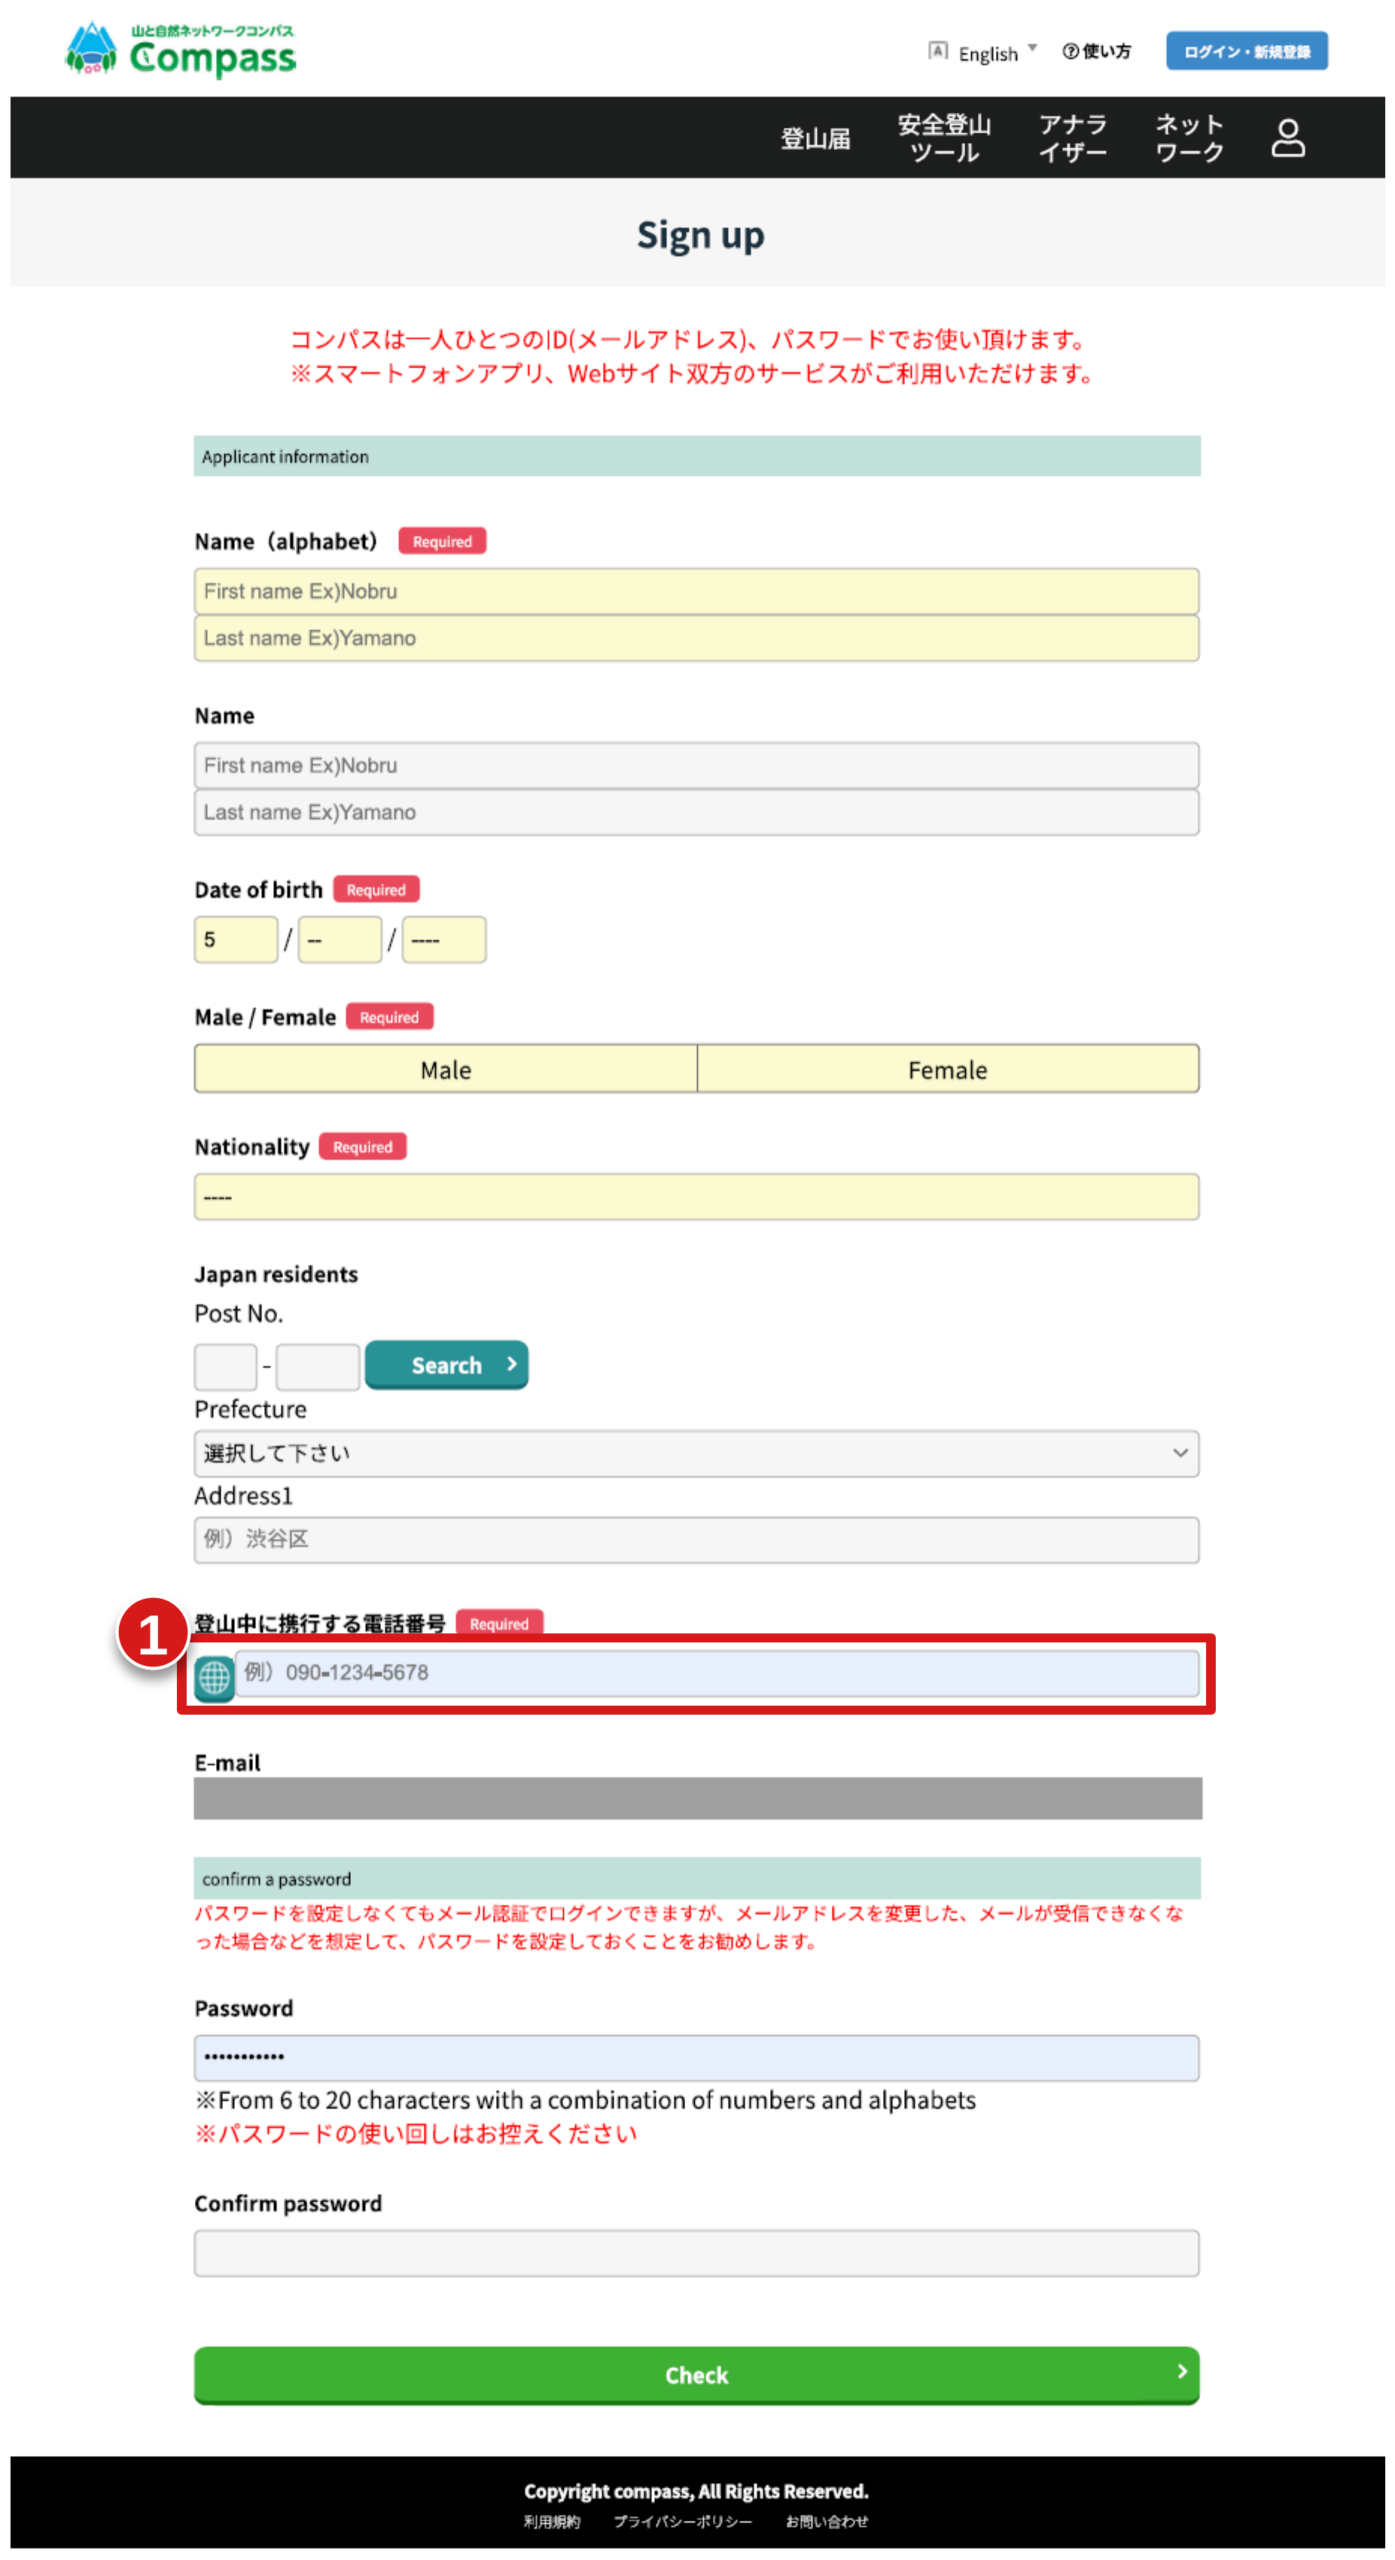
Step 4: Fill in your registration details. The field asking for a number to reach you “while hiking” (1) wants your mobile number, not a home or work line. Fill in the rest of the form — name, date of birth, nationality, and address — set a password, and press Check to review, then submit — and your account’s ready to go 👏.
Submitting a Tozan Todoke with Compass
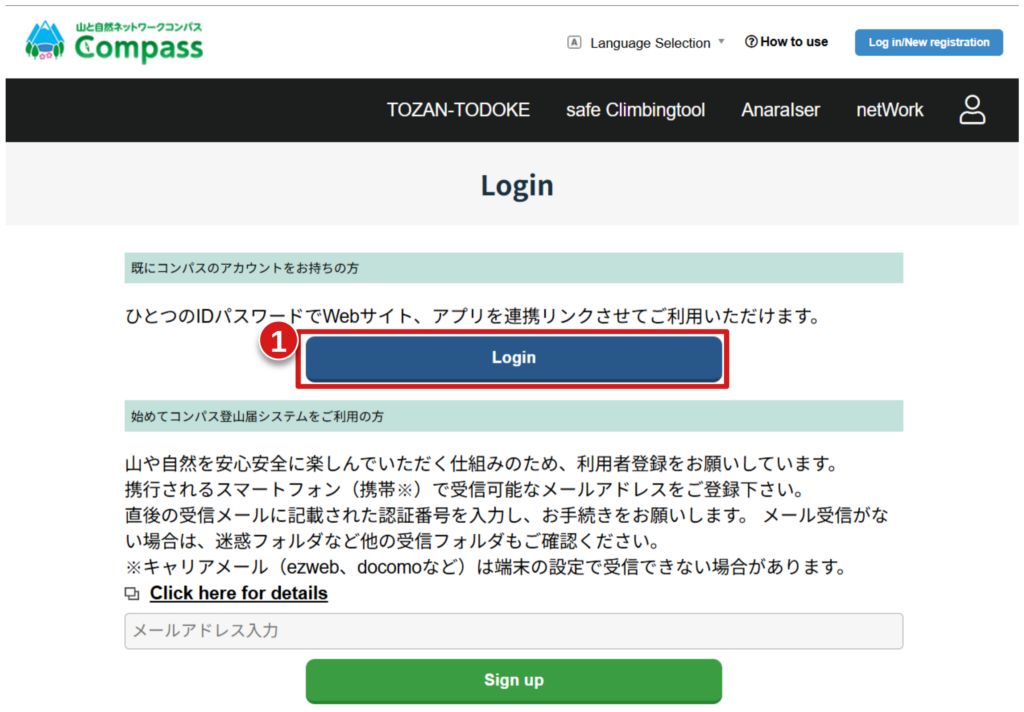
Step 1: Log in. Back on the Compass homepage, click the login icon (top right) and press Login (1), then sign in with the email and password you just registered.
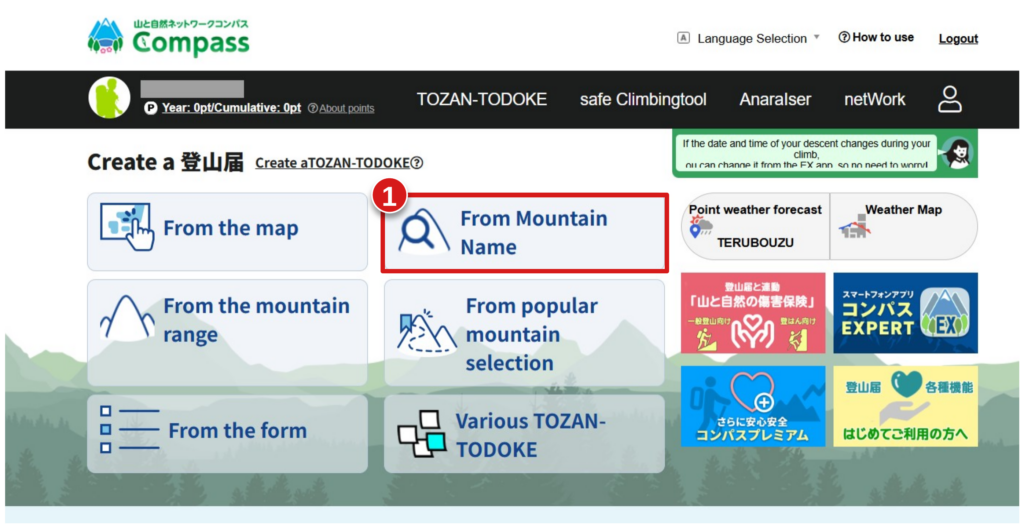
Step 2: Start a new tozan todoke. Once you’re logged in, you’ll land on the “Create a Tozan Todoke” page, now with your account shown in the top bar. You can search for your mountain four different ways: from the map, from the mountain name, from the mountain range, or from a list of popular mountains. Unless you already know your way around Japan, From Mountain Name (1) is the easiest option and the one I’ll use here.
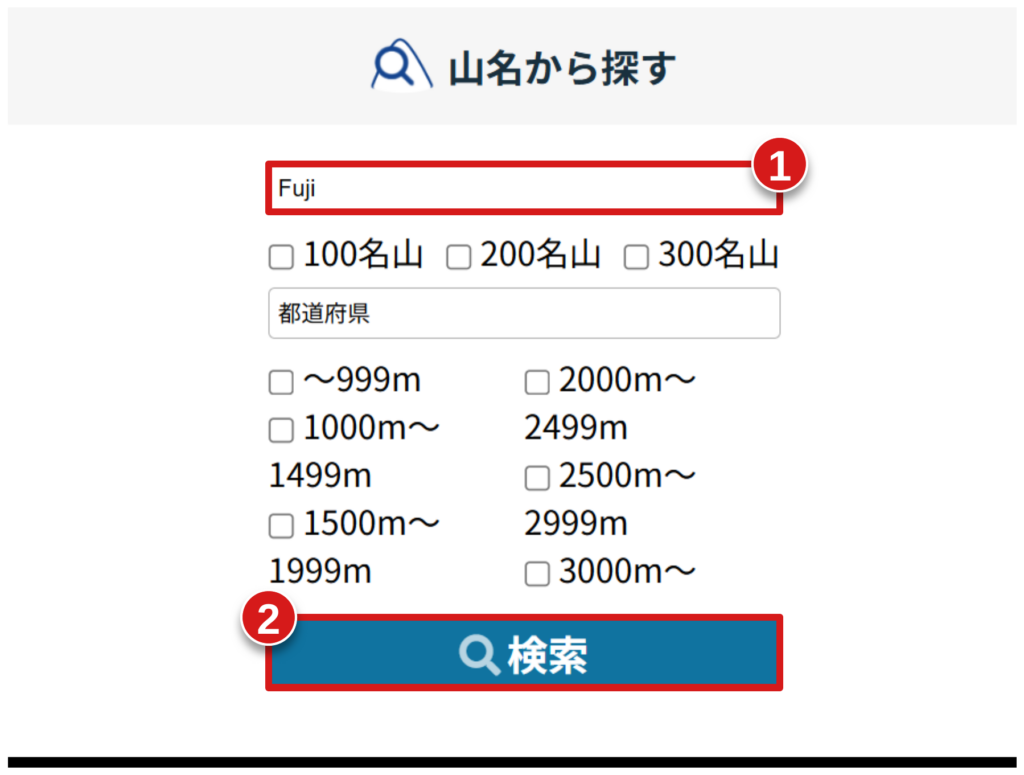
Step 3: Search for your mountain. Type the mountain’s name into the field at the top (1) and press the magnifying glass (2). You can also filter by elevation, prefecture, or whether it’s one of Japan’s “100/200/300 famous mountains” (百名山, 二百名山, 三百名山) lists, but for most searches the name alone is enough.
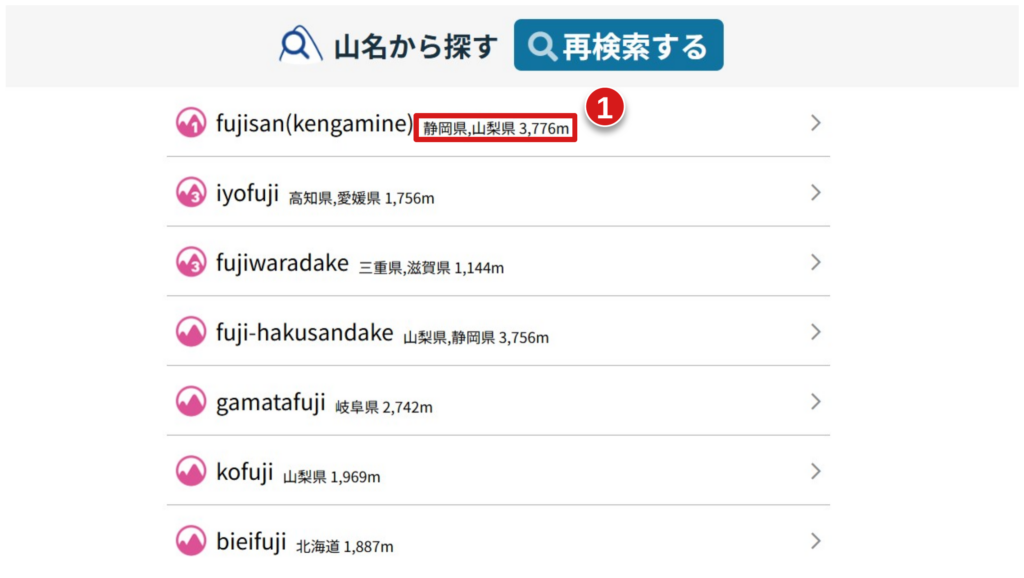
Step 4: Pick your mountain from the results. A common mountain name can return a long list of matches from all over Japan, since many peaks share the same name. Use the elevation and prefecture shown next to each result (1) to find the right one, then tap it to open its map.
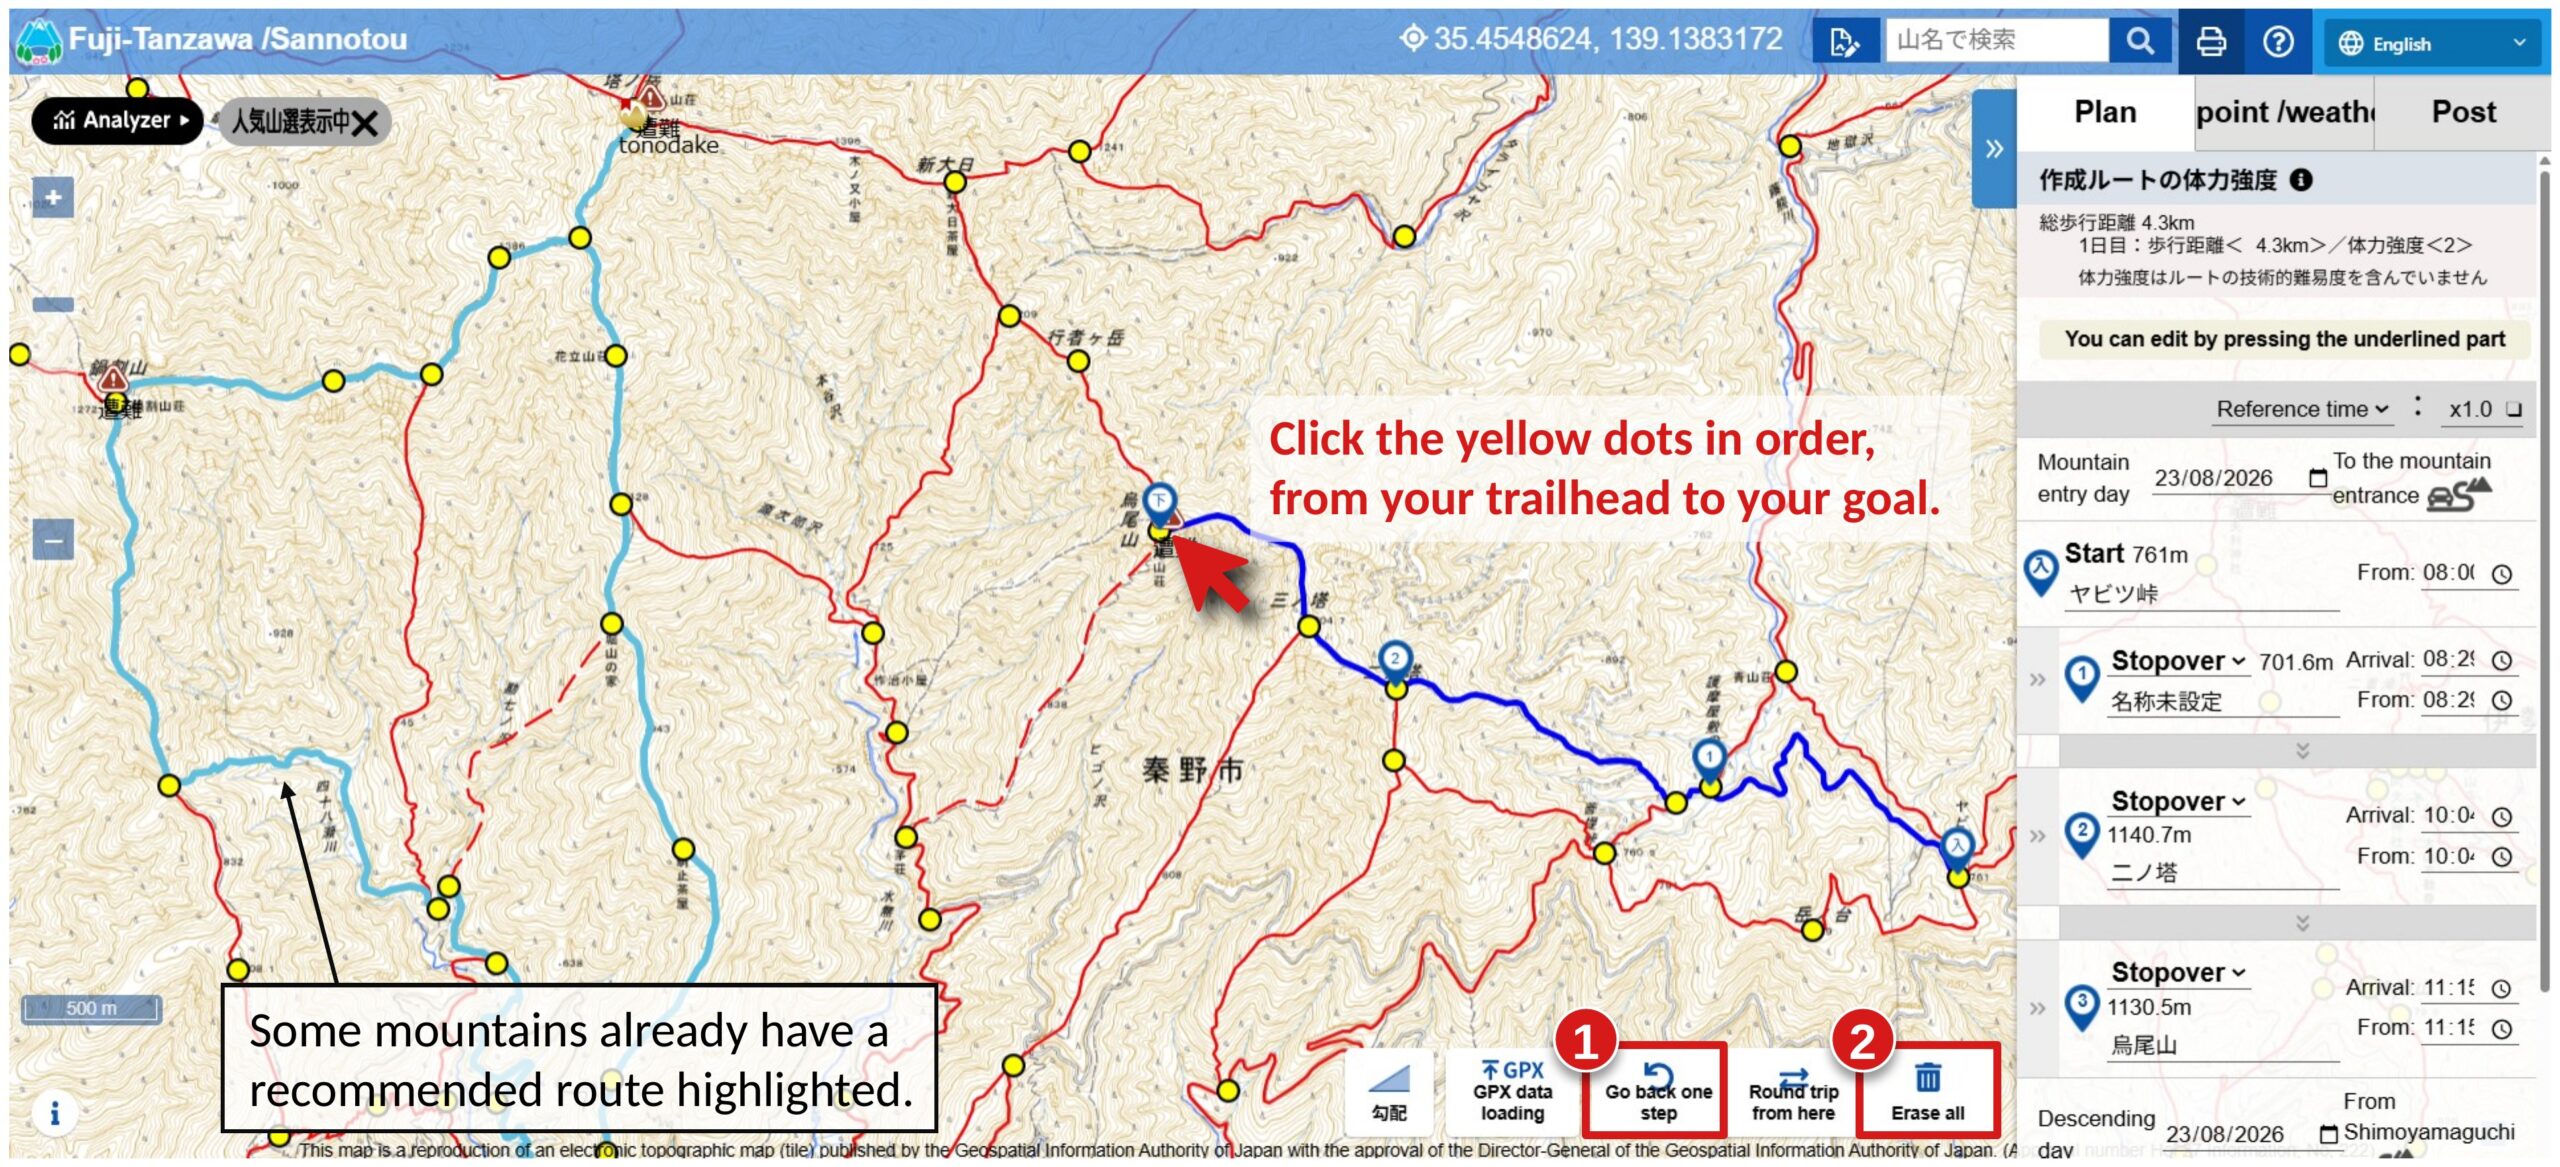
Step 5: Plot your route on the map. This opens a topographic map with common routes already highlighted, plus a string of yellow dots marking trail junctions and waypoints. 💡Building your route is simple: click the yellow dots one by one, in order, from your trailhead to your goal. Go slowly and deliberately — clicking a dot out of sequence can send your route on a strange jump or detour, so it’s worth building it a few points at a time and checking the line as you go. If you make a mistake, Go back one step (1) undoes your last click, and Erase all (2) lets you start over completely; you can also import a route directly from a GPX file if you have one. As you add points, they’ll appear listed in the sidebar on the right, with any point in between your start and end points labeled Stopover by default. When you’re done, scroll through that sidebar and double-check that your start point (Trailhead) and end point (Trailend) are exactly where you planned — it’s an easy thing to get wrong on a busy map.
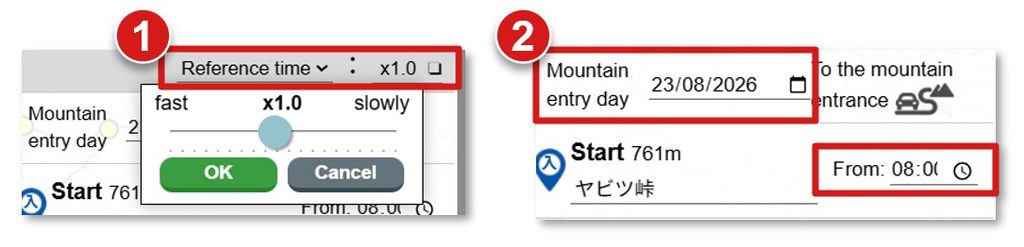
Step 6: Set your pace, date, and start time. With your route selected, look at the sidebar on the right. Set your Reference Pace (1) — 1.0x is an average pace, so choose something smaller (e.g. 0.8x) if you’re faster than average, or larger (e.g. 1.2x) if you’re slower or hiking with a larger group. Then set the date you’ll enter the mountain (2) and your planned start time.
Compass will calculate an estimated arrival time at every point along your route — scroll the sidebar down to see your predicted descent time at the end. Build in a real safety margin here: make sure that predicted finish time is comfortably before the last bus or train out and before sunset. (If your hike involves an overnight stay, you can change the relevant point from “Stopover” to “泊地” (stay place) to continue planning the next day’s route from there.) Once you’re happy with the plan, scroll down and press Go to Plan creation.
Step 7: Fill in the plan details. This page fleshes out the route you just built into a full tozan todoke: your destination and purpose, the start/via/finish points with their times (carried over automatically from the map), your party size, and insurance and equipment details — plus your emergency contacts, which I’ll walk through separately just below since it’s worth extra care.
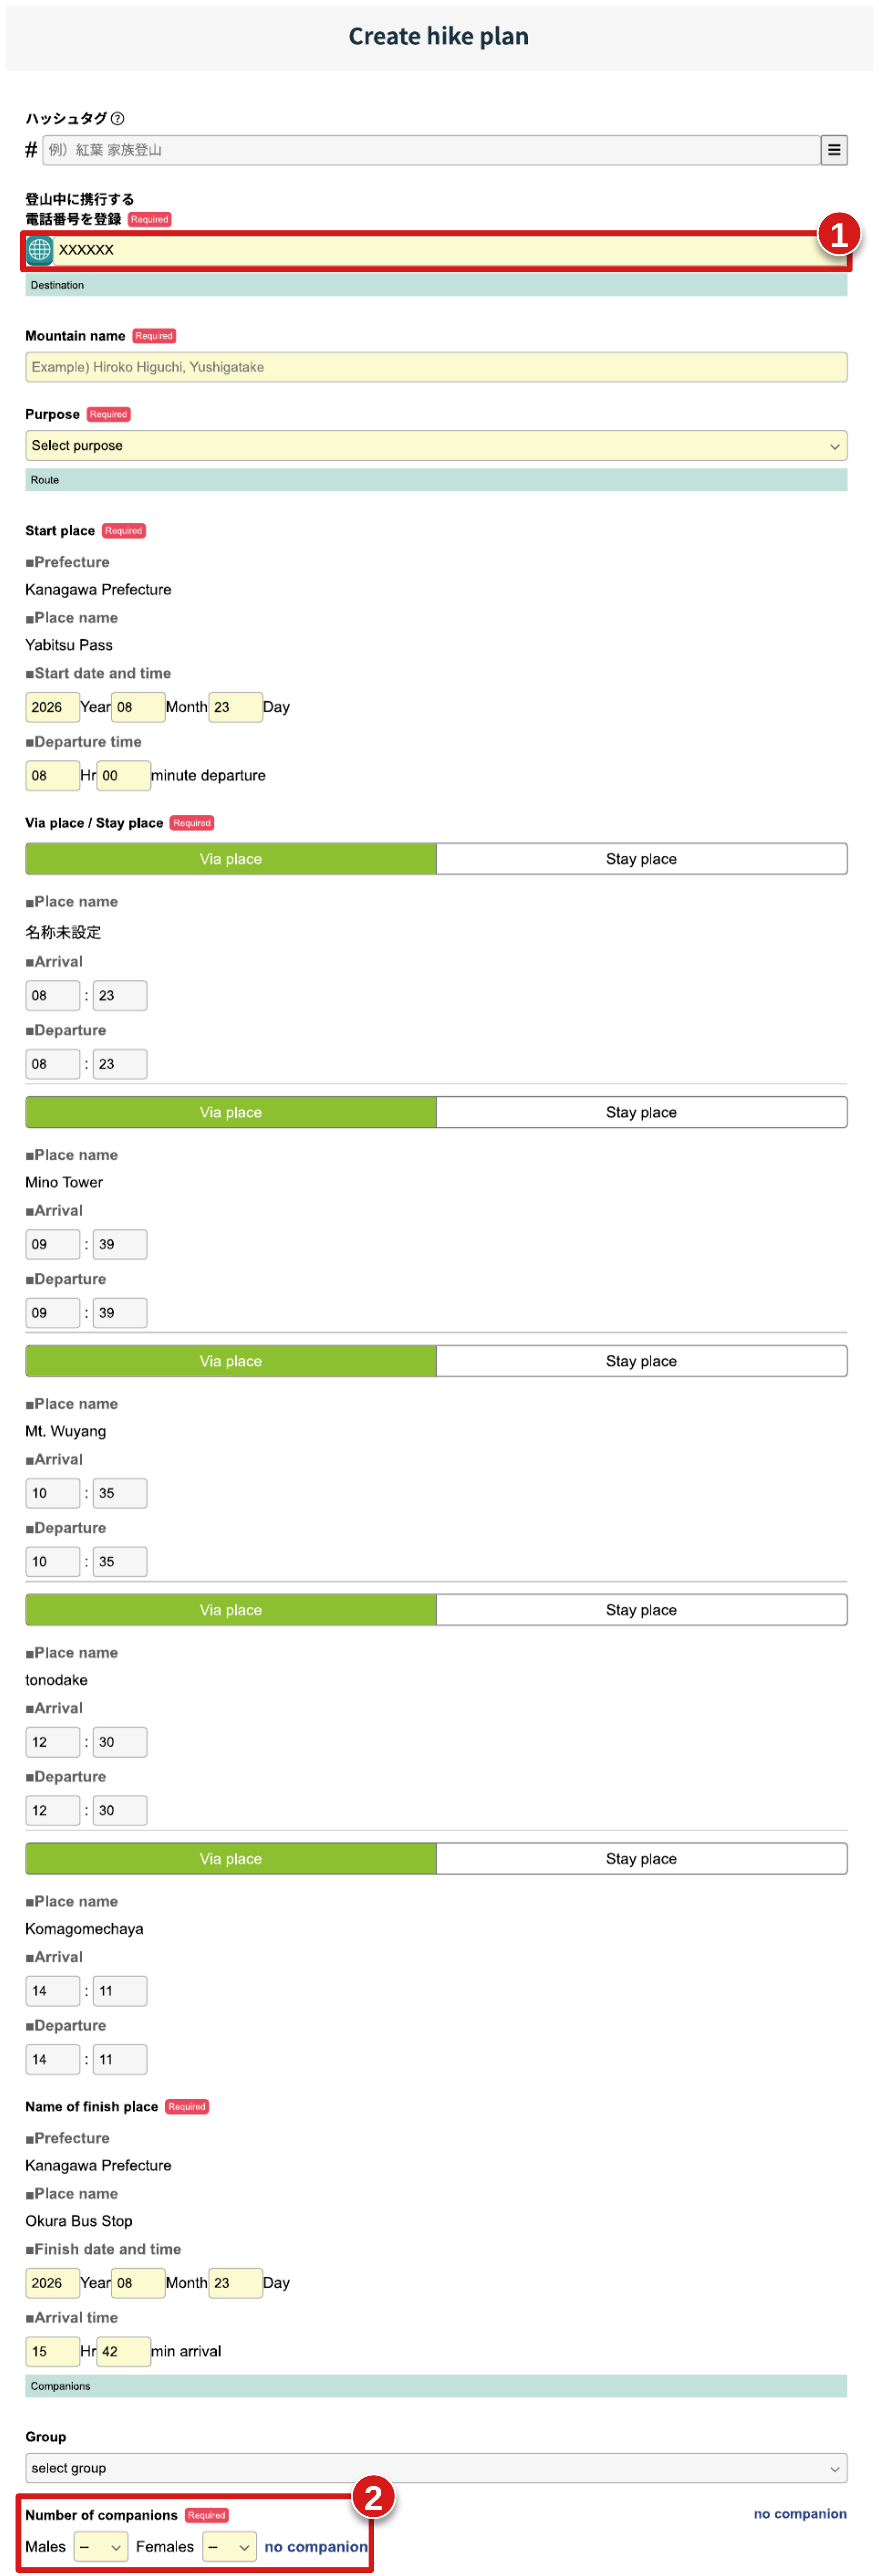
A few fields here are easy to get wrong, so slow down for these:
Phone number: (1) enter it in full international format, with your country code out front (e.g. +81 for a Japanese number, +1 for the US or Canada) — not just the local digits you’d dial at home.
Number of companions: (2) this field defaults to 0 for both counts. Hiking solo? Press the “no companion” option. Otherwise, update the counts for anyone joining you — a single male companion, for example, is entered as “Males: 1, Females: 0.”
Step 8: Register your emergency contacts (required). Add at least one person who is not hiking with you — someone who will actually notice if they don’t hear from you and knows to act on it. Include their phone number (1) — Compass keeps it on file as their contact information, and pairs it with the descent-time setting below to decide when to alert them if you don’t check in.
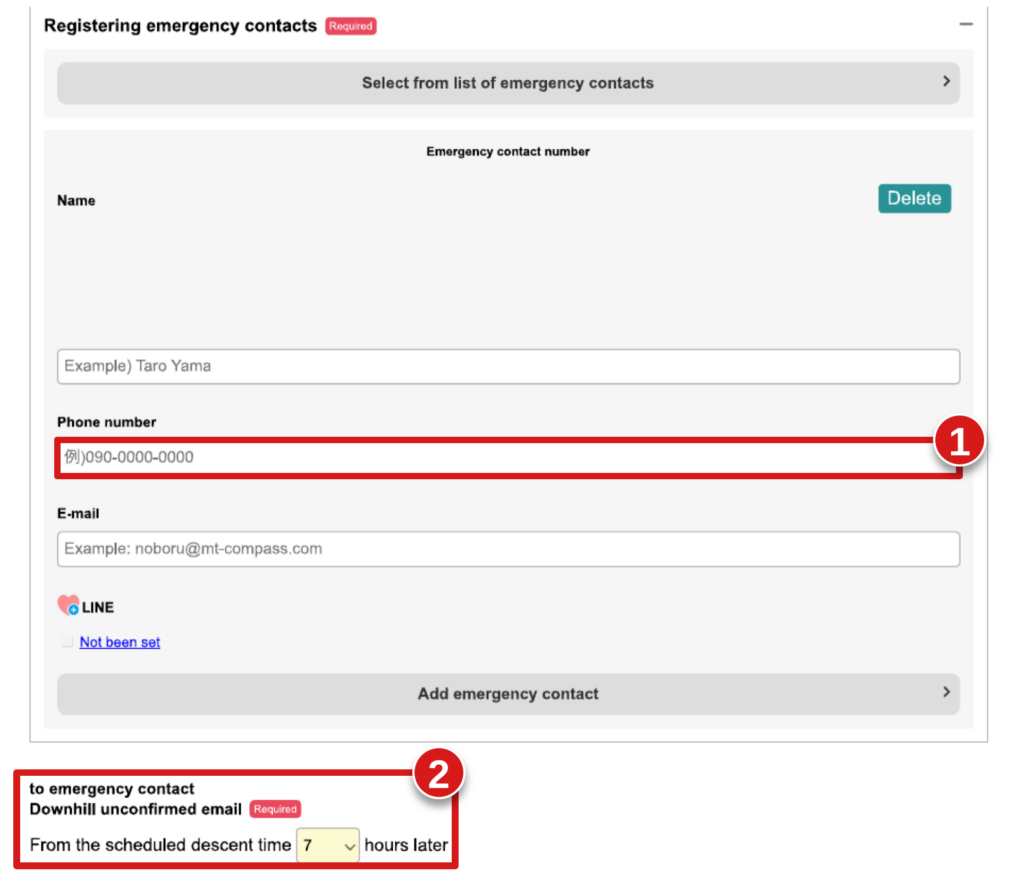
Just below that is a setting worth understanding properly: “Downhill unconfirmed email — from the scheduled descent time, [ ] hours later.” (2) Here’s exactly what it does. If you haven’t tapped Finished in Compass by your scheduled descent time, the system starts emailing reminders to you at intervals building up to the number of hours you set in this field — selectable from 3 to 10 hours after your scheduled descent time. If you still haven’t tapped Finished by then, Compass sends an “unconfirmed” alert email to your registered emergency contact, not to the police.
💡Compass itself does not automatically call or notify any police department — it’s the emergency contact who receives that alert email and has to decide what to do next. That’s exactly why choosing someone reliable, and giving them a heads-up that they might get this email, matter as much as filling out the form itself. Set the hours here to something that fits your trip and gives your contact a realistic amount of time to notice and react.
Fill in your insurance and equipment details below that — these are optional but worth completing if you have them — then scroll to the bottom and press To confirmation screen.
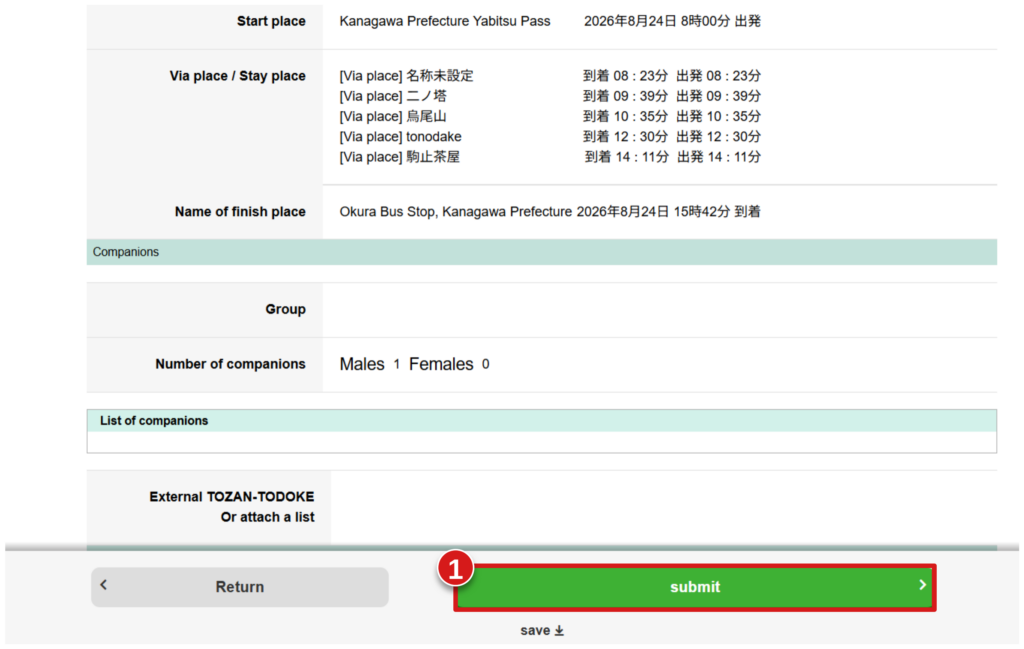
Step 9: Review and submit. The confirmation screen lays out everything you entered — your route with arrival (出発) /departure (到着) times at every point, your finish location, and your party details — in one place. Read through it once more, and if everything looks right, press Submit (1).
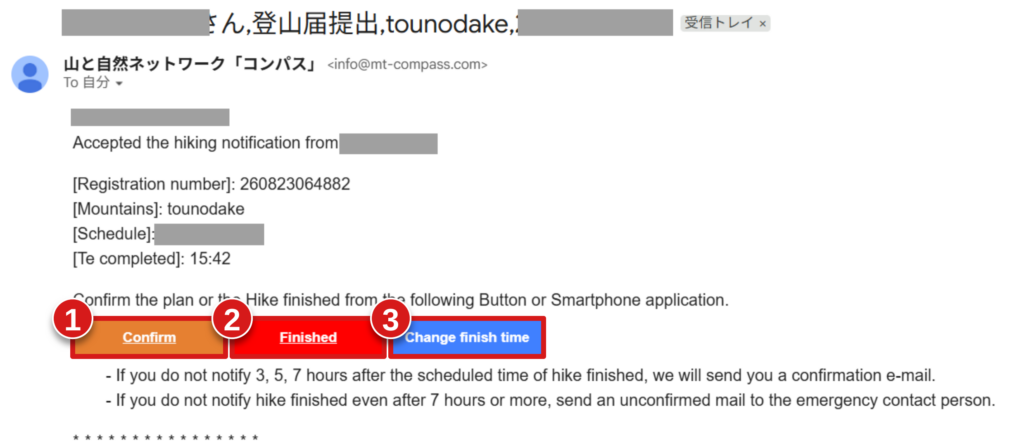
Step 10: You’re done — watch your email. You’ll get a confirmation email once your tozan todoke is accepted. Keep it handy — if your plans change or you need to cancel, you can update things from the links inside it, and it’s the same email you’ll come back to once you’re off the mountain to close things out.
That’s it — your tozan todoke is filed. Go have a safe, great hike!⛰️
Once You’re Off the Mountain
You made it down — nice work👏. Before you head for the onsen and crack open a well-earned beer, there’s one more thing to take care of.
Open the confirmation email from Step 10 and tap Finished. That’s the one action that actually closes out your tozan todoke — it tells Compass you’re safely off the mountain, and it’s what stops the reminder emails (and the alert to your emergency contact) from going out.
Now go enjoy that beer🍻— you earned it. Safe hiking out there!